Today we’re going to show you how to set up Google Search Console You may assist yourself with your Google search engine optimization using a variety of tools (SEO). Some of those tools / Website are subscription-based and provided by outside businesses. Others are provided directly by Google and are not simply free.
Google Search Console (GSC), one of the greatest tools, may give you important information about the position of your website in search engine results and its general online visibility. Given that information, you might want to configure Google Search Console for your website but be unclear about where to begin.
That’s why we’ve produced a simple, step-by-step guide to help you get started with Google Search Console. Continue reading to find out more!
What is Google Search Console?
Google Search Console is a Google portal that allows you to track your SEO performance. To be more specific, it allows you to view metrics such as:
-
Clicks
-
Impressions
-
Core Web Vitals
-
Rankings
-
And more!
You may also use Search Console to find backlinks, improve your site’s mobile friendliness, and more. Overall, it’s a great tool for tracking and enhancing your website’s presence on Google.
Furthermore, it is free, so there is no excuse not to take advantage of the benefits it provides.
How to Configure Google Search Console
Now that we’ve defined GSC, let’s go on to the primary topic of this page: how to set it up. Setting up Google Search Console consists of three primary phases, which we’ll go over in greater detail below. Continue reading to find out more!
1.log in to Google Search Console.
The first step in configuring Google Search Console is to register an account on GSC’s website. The good news is that you can use Search Console if you already have a Google account.
And if you don’t have a Google account yet, the first thing you’ll want to do is get one.
It’s simple to log in and get started from there. However, logging in does not immediately grant you access to all of Search Console’s features; you must first add and verify your website.
2. Make your website property.
The next step in the Search Console configuration is to add your website as a property. A “property” in this context refers to whatever you wish to track with GSC — most likely your website, though it can also refer to apps.
When you log in for the first time, you will be prompted to do so. You’ll have two choices when it comes to adding your site as a property. The first method is to use your domain, and the second is to use a URL prefix.
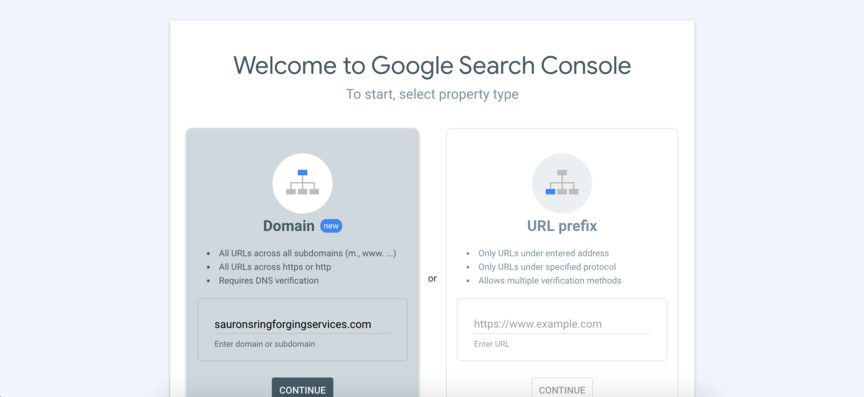
Because it is easier, using your domain is usually the best option. If you choose to use a URL prefix, you may need to repeat the process for each edition of your site. For example, if you have an HTTP version and an HTTPS version, you must repeat the process for each.
3. Verify your website
The final step after adding your site is to validate your ownership of it. The procedure differs based on whether you choose the domain or URL prefix in the previous step. Let’s go over how to validate each one.
Domain validation
You must go through your domain name service (DNS) provider to authenticate your website utilizing your domain. For example, if you utilized GoDaddy for your name and hosting, you’ll have to go through them.
When Search Console prompts you to validate your site, it will display a drop-down option for service providers. If your DNS provider is shown in the menu, you can click it to receive further instructions for that service.

To verify your domain, you’ll need to follow those precise instructions. However, the general procedure should be as follows:
- Click “Copy” next to the TXT record GSC provides.
- Visit your DNS provider’s site and log in.
- On your provider’s website, pull up the domain you want to verify in GSC.
- Locate your domain management screen and add a new DNS record.
- Choose “TXT” as the type of record.
- Type in “@” under “Host.”
- Paste the TXT record you copied into the provided field.
- Click “Save.” Then go back to Search Console and click “Verify.”
Then, under GSC, you should get a success notification stating that your site has been confirmed. However, verification can take up to 72 hours, so give it some time before concluding that it did not work.
Verifying a URL prefix
There are a few ways to verify using your URL prefix.
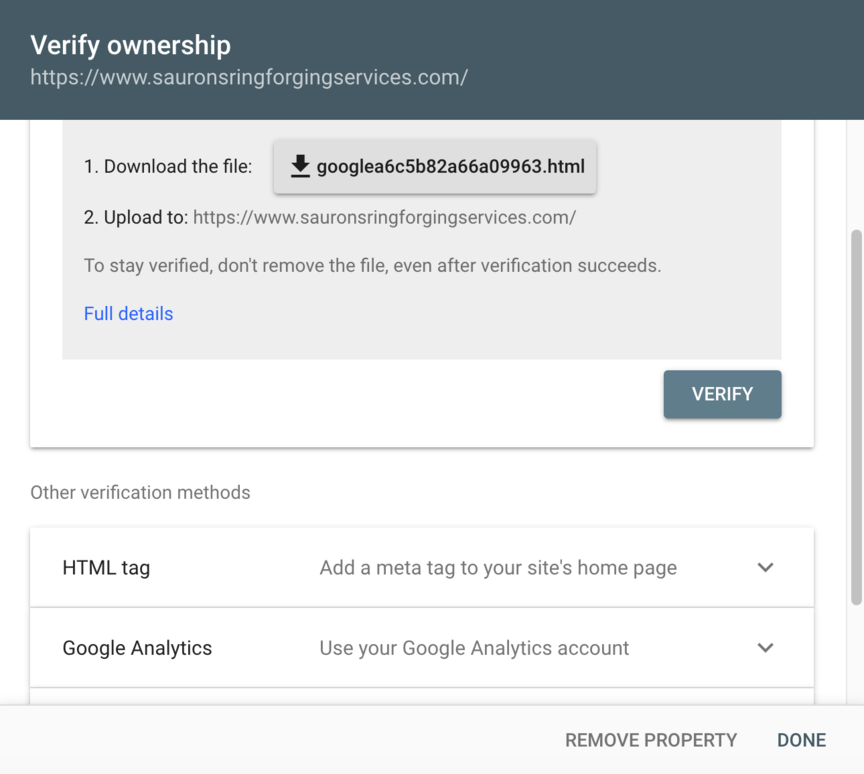
The first method is to upload an HTML file to the root folder of your website. The file will be sent by Search Console for download. The file will subsequently be uploaded to your site’s root directory.
You can also use an HTML tag to validate. The methods for this process vary widely depending on the content management system (CMS) you use, but the basic idea is that you will add a meta tag to your website’s header area.
Finally, if you already have Google Analytics or Google Tag Manager installed on your website, you can click a button to check using one of those systems.
What to do when you’ve installed Google Search Console
You’ve finally finished configuring your GSC account and are ready to begin using the platform. So, what are you going to do now?
The initial step should be to submit your sitemap to GSC. This will help your website rank higher quickly. Simply click “Sitemaps” in Search Console and enter the URL for your website’s sitemap. If Google hasn’t previously crawled and indexed your site, this step will ensure that it has.
Then, using Google Search Console, you can start collecting stats and looking for methods to improve your website’s SEO!
To get started with our SEO services, just call +91 9594309652 or contact us online today!


0 Comments